
The Loudspeaker Frame (MDF or plywood)
The wood I used was a MDF fibreboard, 30 mm thick, a great width which gives a very good resistance to vibration and a very sturdy heavy frame for the membranes (together with the perforated metal plate), helping considerably to make the bass frequencies all the more attractive, something that can be considered the soft point of the project.
That is, at least, the theory, I now think it’s overkill and a thinner wood frame (19 mm – 22 mm) is the way to go.
Having such a thick piece of wood makes the cutting a real adventure; MDF boards create an incredible amount of wood dust, so beware!
It also creates a problem not considered in the original project (they were smarter): how do you get the magnets close enough to the membrane? (See Aluminum L-Profiles for the solution).
It is much heavier than the original project frame; the loudspeaker foot has to be much stronger than they recommended, obviously!
I think it is best to have the wood cut by an expert; here in Chile that is very inexpensive, that may not be the case in your country. If you plan to paint your loudspeakers, do it after it’s been cut and before you start doing anything else.
Danish Project Reference Dimensions
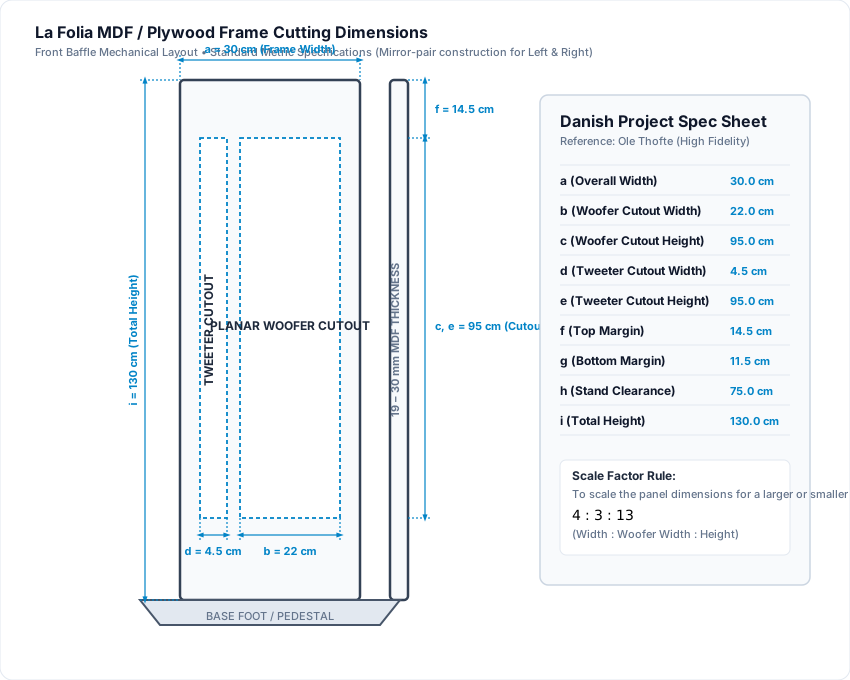
Here are the original Danish project dimensions:
- a = 30 cm (Overall Frame Width)
- b = 22 cm (Woofer Cutout Width)
- c = 95 cm (Woofer Cutout Height)
- d = 4.5 cm (Tweeter Cutout Width)
- e = 95 cm (Tweeter Cutout Height)
- f = 14.5 cm (Top Margin)
- g = 11.5 cm (Bottom Margin)
- h = 75 cm (Stand Clearance)
- i = 130 cm (Total Frame Height)
If you want a bigger or smaller loudspeaker, use the following proportional relationship:
4 : 3 : 13
(Frame Width : Woofer Width : Overall Height)
This also changes other dimensions, so be careful and check everything out before doing anything irreversible to your material.
Original Reference Sketches
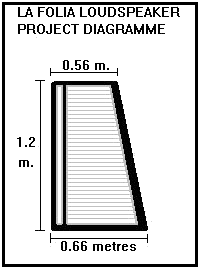 Figure 1: Original silhouette sketch
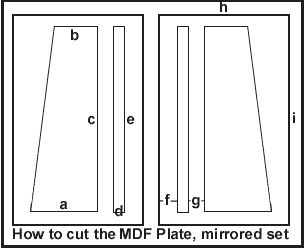 Figure 2: Original Danish dimension lettering